• Skip to primary navigation
  • Skip to main content
  • Skip to primary sidebar
  • Skip to footer
Arizona Spa Girls

Arizona Spa Girls

Insider guide to Arizona spas and beyond!

  • AZ Spa Girls Home
  • Find AZ Spas & Salons
  • AZ Spa & Salon Reviews
  • Spa Blah Blah Beauty Blog
You are here: Home / DIY Beauty Recipes / Make Your Own Melt-and-Pour Loofah Soaps

Make Your Own Melt-and-Pour Loofah Soaps

12/08/2016 by azspagirl

A fun and easy recipe for making your own colorful, fragrant loofah soap.

You won’t believe how easy it is make your own soaps—when you get expert guidance that is. We were lucky enough to have DIY queen, Anne-Marie Faiola, share this recipe for revitalization with us. Inspired by her love of crafting suds and sundries, Anne-Marie founded Handmade Beauty Box, a DIY subscription service that caters to do-it-yourselfers by delivering quality beauty and spa projects monthly to your door.

Follow Anne-Marie’s recipe to make these loofah soaps in about 30 minutes. Loofah, a natural exfoliant, is folded into this cleansing bar to buff away dead skin cells and soothe flaky and patchy skin. Formulated with a reviving garden fragrance oil, these vibrant soaps polish skin while locking in moisture. You can find melt-and-pour soap color blocks and soap-making supplies at most craft stores or online at brambleberry.com.

Here’s what you need:

  • 2 lbs Clear Melt and Pour Soap Base
  • 1 Electric Bubble Gum Color Block
  • 1 Tangerine Wow Color Block
  • 1 oz Sunny Herb Garden Fragrance Oil
  • 2 oz spray bottle filled with rubbing alcohol
  • 8 soap molds with lids
  • 2 microwave-safe bowls
  • 1 loofah
  • 1 dropper
  • Spoons
  • Scissors
  • Paper towels

Here’s what you do:

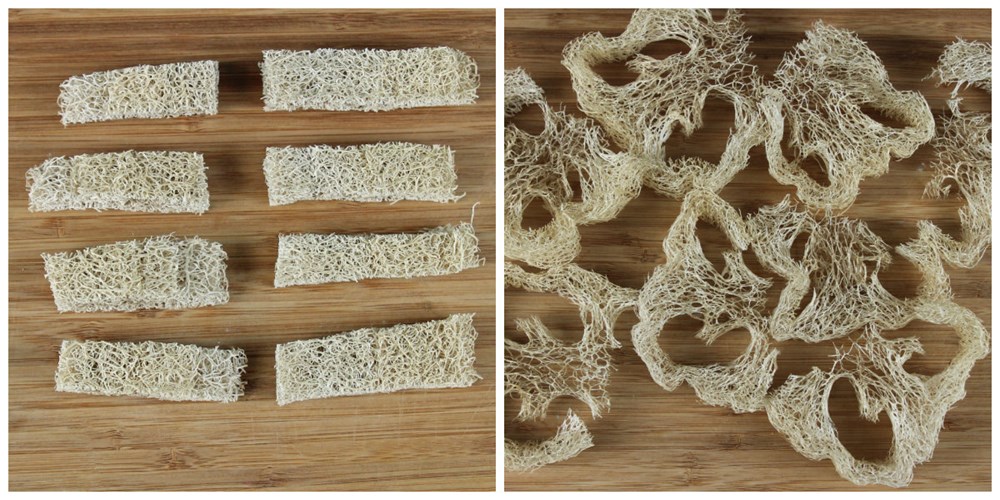
First prep your loofah. Cut the dry loofah sponge into eight even pieces by cutting once vertically then cutting each half into four pieces. Next, add the loofah sponge pieces to water to reconstitute and remove seeds as needed. Towel-dry each loofah piece to remove excess water. Set aside.

loofah soaps

Make sure you have all your supplies and then follow these steps.

  1. Cut the soap base into 1-inch cubes and divide equally into the two bowls.
  1. Melt the first container of soap in the microwave on 30 second bursts, stirring in between bursts with a spoon, until the soap is fully melted.
  1. Slice off a sliver of the Tangerine Wow color block and mix a small amount into the first container of melted soap until you achieve a bright orange hue. What you see is what you get with these colorants so add more if you want a brighter color.
  1. Add four droppers full of fragrance oil to the melted orange soap base and stir until the fragrance oil is fully distributed (about 12 ml).
  1. Repeat steps 2, 3 and 4 using the Electric Bubble Gum color block and your second bowl of soap.
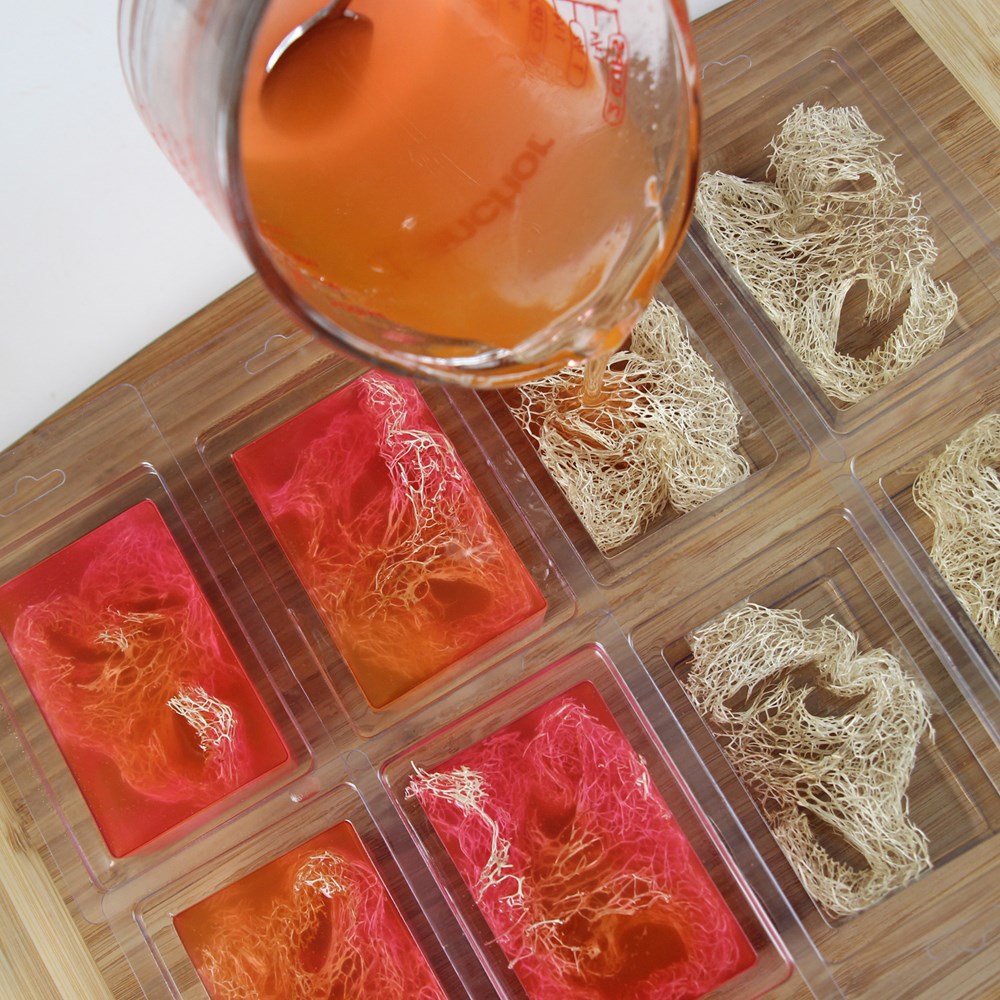
  1. Place one loofah sponge in each rectangle mold. Don’t worry if the loofah sponges are still damp. Trim the sponges if needed. Ideally, you want both containers of soap around the same temperature when you pour. If you have a thermometer, the magic temperature is about 130° Fahrenheit. If you don’t have a thermometer, no problem. Let the soap cool down until it thickens and gets a “skin” on top. The soap should not be hot. If the soap cooled down too much, just pop it back in the microwave on 30 second bursts. Heat as needed.
  1. The color fusion technique is all about the pour. Pour the pink soap into four molds only filling up the molds half way. Next, pour the orange soap on top of the pink soap to fill the mold all the way to the top. Repeat this step for the remaining four soap molds, pouring the orange soap first and the pink soap second. Spritz all of the soaps with rubbing alcohol to eliminate bubbles.

loofah soap molds

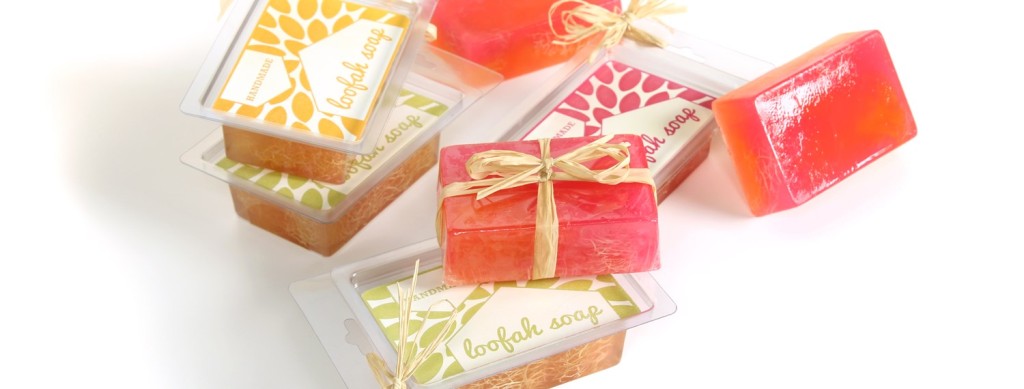
  1. Let the soaps harden for at least 12 hours before unmolding. The soap is ready to use right away or add the raffia and labels (download here) to the soap mold and give them away as gifts. Your friends and family will love you!

diy loofah soaps

For ingredients, or to have your own own DIY beauty projects delivered right to your door, visit handmadebeautybox.com.

Thank you for sharing! ❤

  • Click to share on Facebook (Opens in new window)
  • Click to share on Twitter (Opens in new window)
  • Click to share on Pinterest (Opens in new window)
  • Click to email this to a friend (Opens in new window)
  • More
  • Click to share on Pocket (Opens in new window)
  • Click to share on LinkedIn (Opens in new window)
  • Click to share on Skype (Opens in new window)
  • Click to share on Tumblr (Opens in new window)
  • Click to share on Reddit (Opens in new window)
  • Click to print (Opens in new window)

Related

Filed Under: Body, DIY Beauty Recipes

Disclosure Statement

Arizona Spa Girls may earn a small commission for our endorsement, recommendation and/or link to products from this website. Your purchase from our carefully culled affiliates goes right back into giving you the tools to glow from head to toe. Maybe a little goes to martinis. View our Advertisers

Reader Interactions

Comments

  1. Reese says

    06/19/2016 at 12:54 pm

    Where did you get the soap molds and the soap boxes with lids

    Reply
    • Lisa Kasanicky says

      06/19/2016 at 1:22 pm

      This is actually an all-one-kit from handmadebeautybox.com. However, you can find soap molds and accessories at some craft stores and specialty soap-making websites like brambleberry.com.

      Reply

Got a comment? Share your thoughts! Cancel reply

Primary Sidebar

Follow AZ Spa Girls

  • Facebook
  • Twitter
  • YouTube
  • Pinterest
  • Instagram
  • LinkedIn

Meet the Arizona Spa Girl

For Lisa Kasanicky, spa hopping is not just an adventure, it’s a job. In 2002, she created AZSpaGirls.com to bring the spa experience to a new generation of relaxation seekers. She is author of "The Complete Idiot’s Guide to Girlfriend Getaways" and a local source for all things spa. Read More

Hum nutrition
the spa dr skincare

Browse Posts by Category

hum nutrition 2021

Trending Posts

  • Spa on the Cheap with a Spa Day Pass
    Spa on the Cheap with a Spa Day Pass
  • Best Kept Secret: Joya Spa's Hammam Ritual
    Best Kept Secret: Joya Spa's Hammam Ritual
  • Prenatal Massage: What to Know, Where to Go
    Prenatal Massage: What to Know, Where to Go
  • Couples Therapy: Spa Treatments for Two
    Couples Therapy: Spa Treatments for Two
  • Zest for Life Grapefruit Mask
    Zest for Life Grapefruit Mask
  • 8 Steps for a Korean Spa Experience at Home
    8 Steps for a Korean Spa Experience at Home
  • Me So Corny Cornmeal Body Scrub
    Me So Corny Cornmeal Body Scrub

DIY Scrubs on ABC15’s Sonoran Living

https://www.youtube.com/watch?v=UvbzhGwarhw
The Better Skin Co.

DIY Beauty Categories

  • Body
  • Eyes
  • Face
  • Feet
  • Gatherings
  • Hair
  • Hands
  • Lips
Cratejoy Green Beauty Boxes
Cleanse
Follow
Find Your Influence
Blog Meets Brand

❤️ Don't be shy, click and buy! Your purchase from our carefully culled affiliates goes right back into keeping you aglow. Maybe a little goes to martinis.

Footer

More Info

  • About AZ Spa Girls
  • Advertiser Index
  • Contact Us
  • Contributors
  • Founder
  • Privacy
  • Subscribe
  • Values

Follow Arizona Spa Girls

  • Facebook
  • Twitter
  • YouTube
  • Pinterest
  • Instagram
  • LinkedIn

What People Are Reading

Spa on the Cheap with a Spa Day Pass
Best Kept Secret: Joya Spa's Hammam Ritual
Prenatal Massage: What to Know, Where to Go
Couples Therapy: Spa Treatments for Two
Zest for Life Grapefruit Mask
8 Steps for a Korean Spa Experience at Home

Our Sites

  • Arizona Spa Girls
  • Arizona Spa Guide
  • AZ Spa Girls
  • Girlfriend Getaways
  • Spa Blah Blah Blog
  • Spa Girl Guides
Arizona Sun
Teadora Skin Superfood

Copyright © 2023 · Arizona Spa Girls, Inc.

  • Spa Beat
  • Special Offers
  • DIY Beauty
  • Expert Advice
  • Spa 101
  • Beauty Blog
  • Subscribe
loading Cancel
Post was not sent - check your email addresses!
Email check failed, please try again
Sorry, your blog cannot share posts by email.